基于Android studio3.6的JNI教程之helloworld思路详解
jdk环境变量配置:
path中增加下面2个路径,也就是android studio的路径,android有自带的jdk。
E:AndroidAndroid StudiojrebinE:AndroidAndroid Studiobin
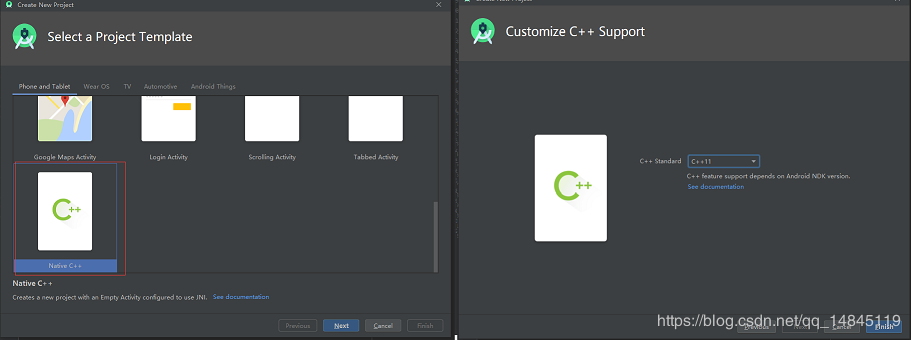
新建工程:
一定要选择Native c++类型,最后要选c++11支持。
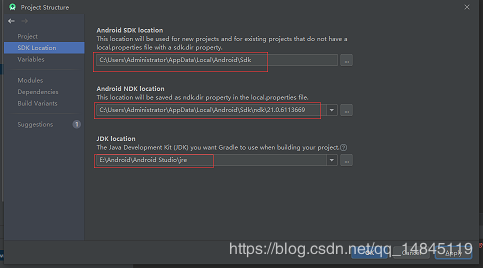
SDK设置:
File->Settings

File->Project Structure
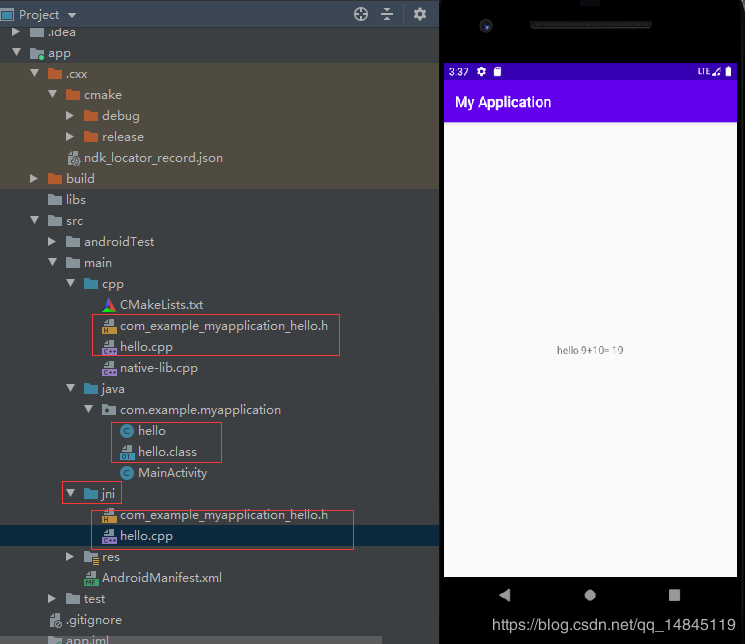
首先确定工程的目录结构,然后尝试运行一下工程,使用模拟器,确保工程没问题,

在MainActivity的同级目录,新建一个hello.java,然后做一个简单的实现,
package com.example.myapplication; public class hello { public native int add(int i, int j);}
使用android studio自带的Terminal进入该hello.java所在目录,执行,
javac hello.java
Terminal下回到app/src/main所在目录,执行,
javah -d jni -classpath ./java com.example.myapplication.hello
此时,会在main目录下面生成一个和cpp,java同级的目录jni。
在该目录结构里面新建hello.cpp。
将com_example_myapplication_hello.h中的内容复制进hello.cpp中,并且进行方法的实现,
#include <jni.h>/* Header for class com_example_myapplication_hello */ #ifndef _Included_com_example_myapplication_hello#define _Included_com_example_myapplication_hello#ifdef __cplusplusextern 'C' {#endif/* * Class: com_example_myapplication_hello * Method: add * Signature: (II)I */ #include 'com_example_myapplication_hello.h' JNIEXPORT jint JNICALL Java_com_example_myapplication_hello_add (JNIEnv *, jobject, jint i, jint j){return i+j;} #ifdef __cplusplus}#endif#endif
将com_example_myapplication_hello.h,hello.cpp这连个文件复制到cpp所在的目录,
然后修改CMakeLists.txt,增加,
add_library( # Sets the name of the library. hello # Sets the library as a shared library. SHARED # Provides a relative path to your source file(s). hello.cpp )
修改target_link_libraries如下,
target_link_libraries( # Specifies the target library. native-lib hello # Links the target library to the log library # included in the NDK. ${log-lib} )
修改hello.java的调用方式,
package com.example.myapplication; public class hello { static { System.loadLibrary('hello'); } public native int add(int i, int j);}
修改MainActivity.java中的onCreate函数,
protected void onCreate(Bundle savedInstanceState) { super.onCreate(savedInstanceState); setContentView(R.layout.activity_main); // Example of a call to a native method TextView tv = findViewById(R.id.sample_text); //tv.setText(stringFromJNI()); tv.setText('hello 9+10= ' + new hello().add(9, 10)); }
然后,rebuild project,没有错误后,然后run app。
最终程序整体目录结构,以及运行效果,
JNI的整体流程思路:
Java先定义一个类,类中定义一个需要c++来实现的方法.通过javah生成需要c++实现的.h的c++头文件实现.h的c++头文件中定义的方法Cmake编译运行
总结
到此这篇关于基于Android studio3.6的JNI教程之helloworld思路详解的文章就介绍到这了,更多相关android studio JNI helloworld内容请搜索好吧啦网以前的文章或继续浏览下面的相关文章希望大家以后多多支持好吧啦网!
相关文章:

 网公网安备
网公网安备